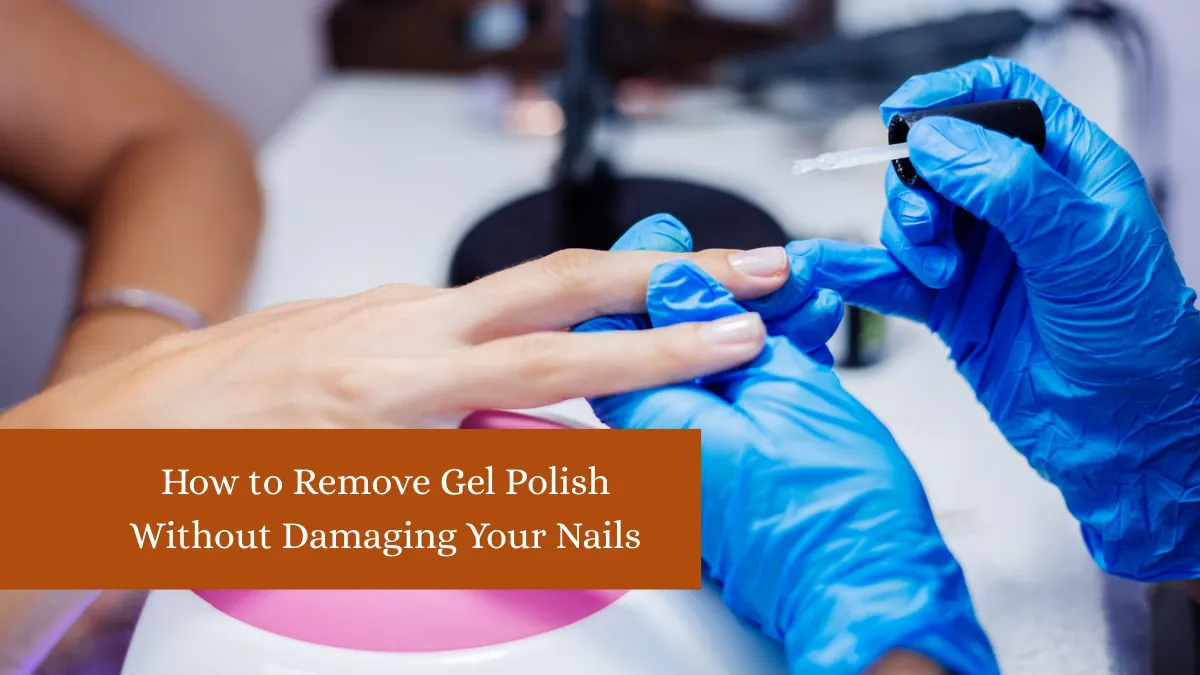
Gel polish is a game-changer for long-lasting, chip-free nails, but improper removal can leave them brittle, peeling, and weak. The biggest mistake many people make is peeling or scraping off the gel, which strips away layers of the natural nail. Healthy nail removal involves patience, the right tools, and gentle techniques that protect the nail plate. Whether you’re removing gel at home or in a salon, the process should preserve your nail health so they’re ready for your next manicure.
The key is to soften the gel so it releases from the nail bed naturally, avoiding any aggressive filing or forceful pulling. In this guide, we’ll walk through step-by-step safe removal methods, tools you’ll need, aftercare tips, and mistakes to avoid. By following these steps, you can maintain strong, smooth nails while still enjoying the benefits of gel manicures. Let’s break down exactly how to remove gel polish without causing damage.
1. Understanding Why Gel Polish Needs Special Removal
Unlike regular nail polish, gel polish is formulated with a blend of acrylic oligomers and monomers that cure under UV or LED light, forming a hard, durable coating. This chemical structure makes it highly resistant to chipping but also more stubborn to remove. The gel bonds tightly to the keratin in your nail plate, meaning that without proper softening, it won’t simply wipe off with remover.
Trying to scrape or peel it off can cause significant damage, removing layers of the natural nail and leaving it thin, uneven, and prone to breakage. Gel polish also typically involves a base coat, multiple gel color layers, and a top coat—all cured separately—creating a thicker barrier than standard polish.
Because of this durability, a specialized removal process is necessary, usually involving acetone, which penetrates and breaks down the gel. Understanding the nature of gel polish helps you see why patience and proper technique are essential for healthy removal.
2. Gathering the Right Tools for Safe Removal
Before you start, having the right tools ready will make the process smoother and safer. At minimum, you’ll need 100% pure acetone, cotton balls or pads, aluminum foil squares, a nail buffer, a cuticle pusher (preferably plastic or wooden), and nourishing cuticle oil. Optional but helpful tools include a nail file for gently breaking the top coat seal, nail clips (as an alternative to foil), and a small bowl if you prefer soaking.
Pure acetone is essential because regular nail polish remover often contains lower concentrations of acetone or added moisturizers that slow down the gel breakdown process. Using lint-free cotton prevents fibers from sticking to your nails during soaking.
The buffer is for lightly roughening the gel surface to help the acetone penetrate faster, while the cuticle pusher helps lift softened gel without scraping the nail plate. Having all these tools within reach ensures a seamless, damage-free removal process from start to finish.
3. Prepping Your Nails Before Removal
Preparation is a crucial step in ensuring your gel polish comes off easily without harming your nails. Start by washing your hands thoroughly to remove oils, lotions, or debris that could interfere with acetone penetration. Using a fine-grit nail file, gently buff the shiny top layer of your gel polish—this step helps acetone work more effectively by breaking the seal on the top coat.
Be careful not to file into your natural nail. If your nails are long, trimming them slightly can reduce removal time and minimize stress on the nail plate. It’s also wise to apply petroleum jelly or cuticle oil around your nail edges and cuticles to protect the surrounding skin from drying out during acetone exposure. Preparing in this way creates the ideal conditions for efficient gel removal and helps maintain the health of both your nails and surrounding skin during the process.
4. The Foil and Cotton Soak Method
The foil soak method is one of the most effective and widely used techniques for gel polish removal. To begin, soak a cotton ball or pad in pure acetone and place it directly over your nail. Wrap a small piece of aluminum foil tightly around your fingertip to hold the cotton in place and trap heat, which speeds up the breakdown process. Repeat for each nail, then let them sit for 15–20 minutes. The trapped heat helps the acetone penetrate through all gel layers more efficiently.
After soaking, gently check one nail by pressing the cotton and wiping—if the gel lifts easily, you’re ready to move to removal. If not, rewrap for another 5–10 minutes. Avoid scraping hardened gel, as this can strip away nail layers. This method is preferred because it targets each nail individually, minimizing unnecessary acetone exposure to surrounding skin.
5. Removing the Gel Without Scraping Damage
Once the gel has softened from soaking, it should lift away with minimal effort. Use a cuticle pusher or orange stick to gently nudge the gel from the nail, starting at the base and moving toward the tip. If the gel resists, stop and rewrap that nail with fresh acetone-soaked cotton for another few minutes—forcing it can cause permanent nail plate thinning. Always work slowly and use minimal pressure.
Avoid using metal scrapers unless they’re designed specifically for gel removal, as they can be too harsh. In some cases, small patches of gel may remain after initial removal—these can be lightly buffed with a fine-grit buffer, but be careful not to over-buff, which weakens nails. The goal is to let the acetone do most of the work, not your tools. By focusing on gentle lifting rather than forceful scraping, you protect the nail’s structure and integrity.
6. Aftercare to Restore Nail Health
After gel removal, your nails and skin will likely feel dry because acetone strips away natural oils. Immediately wash your hands to remove acetone residue, then apply a rich hand cream and nourishing cuticle oil. Massaging oil into your nails and cuticles daily helps restore moisture, flexibility, and shine. If possible, give your nails a break before applying another gel manicure—at least one to two weeks—so they can recover.
During this period, keep nails trimmed and filed, and consider applying a strengthening base coat to protect against splits and peeling. Avoid harsh chemicals, detergents, and prolonged water exposure, which can further dry out nails. Drinking plenty of water and eating a nutrient-rich diet supports healthy nail regrowth from the inside out. Proper aftercare not only restores nail health but also ensures they’re in the best possible condition for your next manicure.
Bottom Line
Removing gel polish without damaging your nails is all about patience, the right tools, and gentle handling. By understanding how gel adheres to the nail, using proper soaking techniques, and prioritizing aftercare, you can enjoy gel manicures without sacrificing nail health. Resist the temptation to peel or scrape, as this causes long-term damage. Healthy nails are the best canvas for beautiful polish—treat them with care, and they’ll stay strong and resilient.
FAQs
1. Can I peel off gel polish if it’s already lifting?
No, peeling removes nail layers and causes lasting damage.
2. Is acetone safe for nails?
Yes, if used occasionally and followed by proper moisturizing.
3. How long should I soak gel nails in acetone?
Usually 15–20 minutes, longer if needed.
4. Can I reuse foil for gel removal?
Yes, if it’s clean and undamaged.
5. How soon can I reapply gel polish after removal?
Ideally after a 1–2 week nail recovery period.
✨ You May Also Like ✨